Build Log #6: Buying a Domain and Connecting It to Your Site
How to buy a .com domain, why .com matters for branding, and how to connect it to Cloudflare Pages — with a full cost breakdown of running a blog.
Let's recap where we are.
I built blog code with AI (Claude Code) on my PC, pushed it to GitHub with Git, and deployed it through Cloudflare Pages — which converts the code into a website and serves it worldwide.
But one thing remains. The domain.
Why Do You Need a Domain?
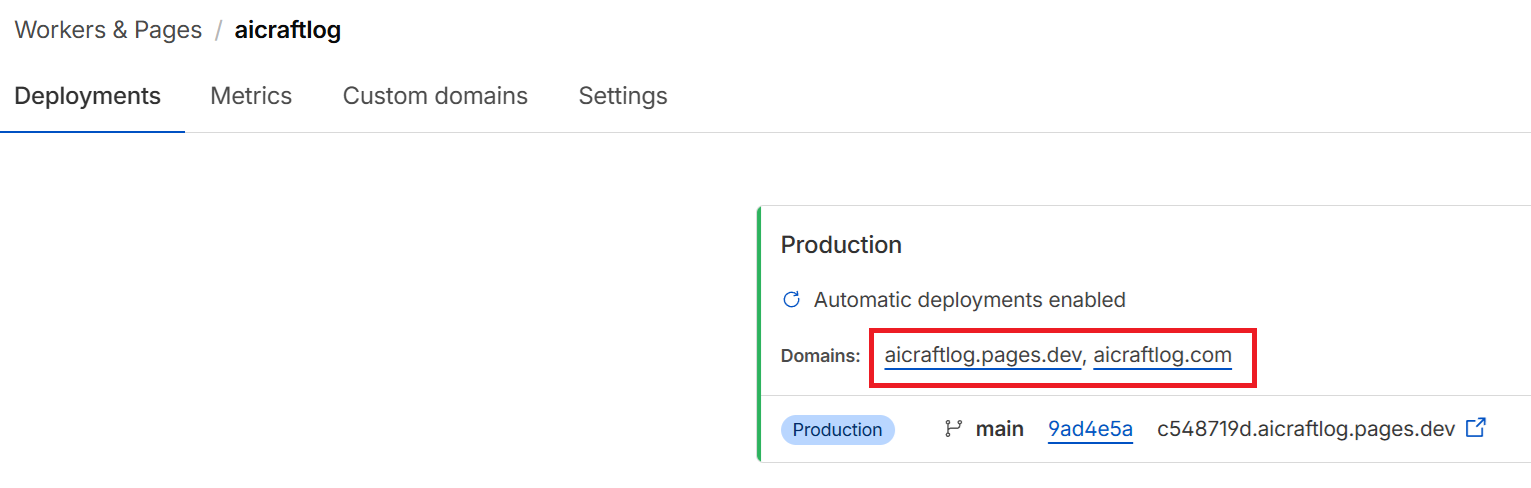
When you deploy to Cloudflare Pages, you automatically get two addresses:
-
aicraftlog.pages.dev— The free default domain from Cloudflare -
aicraftlog.com— A domain I purchased myself
You can access the website through aicraftlog.pages.dev just fine. Functionally, it's identical.
But think about the websites you visit every day. Most of them end in .com — google.com, youtube.com, github.com.
A .pages.dev address looks like a temporary site. Visitors trust it less, and it's harder to remember.
I wanted aicraftlog to be more than just a blog — I wanted it to become a personal brand. So I purchased the aicraftlog.com domain and connected the website to it.
Why .com?
There are hundreds of domain extensions — .com, .net, .io, .blog, and more. I chose .com for three reasons.
1. Trust — .com has been around since 1985 and is the most widely recognized domain. Even when visiting an unfamiliar site, people feel more comfortable if it ends in .com.
2. Memorability — Studies show .com addresses are over 33% more memorable than other domains. When people can't remember a domain extension, they guess .com 3.8 times more often than anything else. Smartphones even have a dedicated ".com" button on the keyboard.
3. Search advantage — Google officially says domain extensions don't affect rankings, but under equal conditions, .com tends to get higher click-through rates and performs better in search results.
Bottom line: if you're building a brand, buy .com.
Buying a Domain (Cloudflare)
There are many places to buy domains — Namecheap, GoDaddy, Google Domains, and more.
I bought mine directly from Cloudflare. The reason is simple: since I'm already deploying with Cloudflare Pages, buying the domain from the same place makes the connection process much easier.
Step 1: Select "Buy a domain"
In the Cloudflare dashboard, go to Domains and select "Buy a domain."

Step 2: Search for your domain
Type your desired domain name in the search bar. For example, type aicraftblog and you'll see various options.
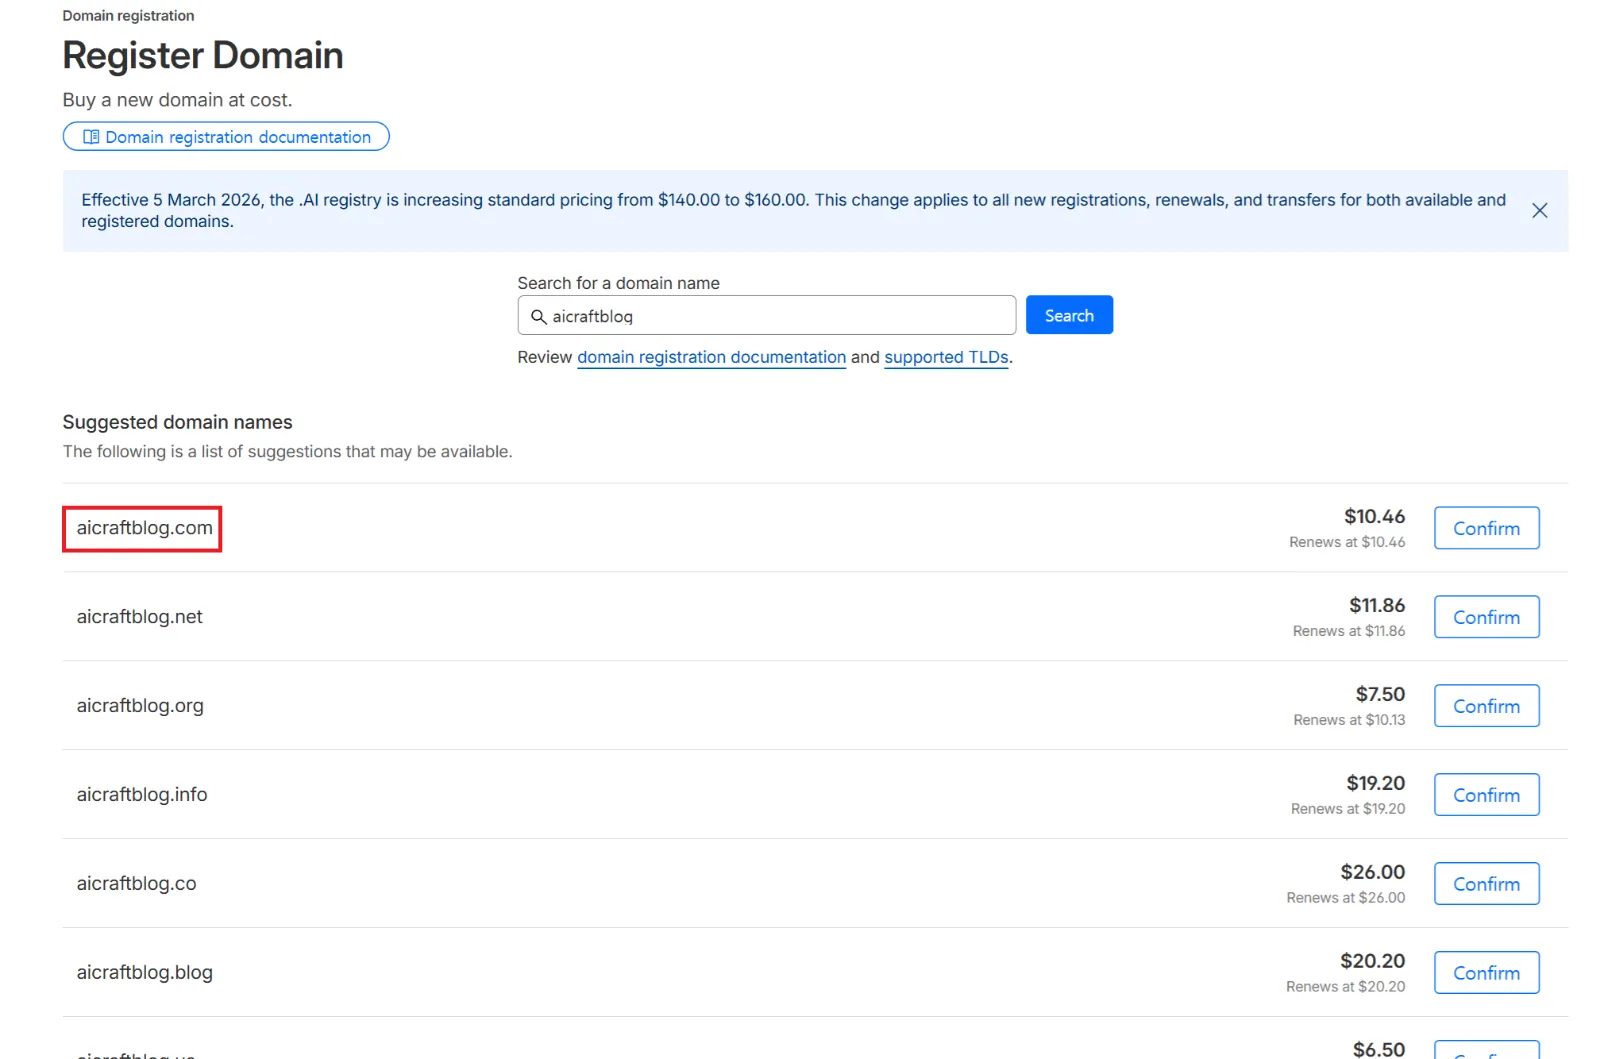
Here you can see that .com costs about $10.46. This is the annual price — roughly $0.87 per month.
Cloudflare sells domains at cost with no markup, so it's often cheaper than other registrars.
Step 3: Purchase
Select your domain, complete the payment, and you're done. The domain will appear in your Cloudflare dashboard immediately.
Tips for Choosing a Domain Name
Before you search, here are some tips for picking a good name:
-
Shorter is better — Easier to type and remember.
-
Make it pronounceable — If you can say it out loud to someone, it's a good name.
-
Avoid numbers and hyphens —
myblog.comis much better thanmy-blog-123.com. -
Check availability — If it says "Available," you can buy it.
Connecting Your Domain to the Site
After purchasing, you need to connect the domain to your Cloudflare Pages project.
If you bought the domain from Cloudflare, this is extremely simple.
Step 1: Go to Custom domains
In the Cloudflare dashboard: Workers & Pages → select your project (aicraftlog) → Custom domains tab.
Step 2: Set up a custom domain
Click "Set up a custom domain" and enter the domain you purchased (e.g., aicraftlog.com).

Step 3: Automatic setup complete
Since you bought the domain from Cloudflare, DNS records are configured automatically. No need to change nameservers or manually add CNAME records.
Within a few minutes, visiting aicraftlog.com will show your blog. HTTPS security certificates are also issued automatically.
If You Bought the Domain Elsewhere
If you purchased from Namecheap, GoDaddy, or another registrar, there's one extra step.
You need to change your domain's nameservers to the ones Cloudflare provides. Go to the DNS settings on your registrar's site and update the nameservers to Cloudflare's. After that, the rest of the process is the same.
Buying from Cloudflare skips this step entirely, so I recommend it for beginners.
Verifying the Connection
Once everything is set up, you'll see two domains listed in Custom domains:
| Domain | Status | Description |
|---|---|---|
| aicraftlog.com | Active | Purchased domain |
| aicraftlog.pages.dev | Active | Default Cloudflare domain |
Both addresses lead to the same website. But when sharing externally, always use aicraftlog.com.
To verify: open your browser, type aicraftlog.com, and check that your blog loads correctly. If it does, you're all set.
Cost Breakdown
Here's what it costs to run this entire blog:
| Item | Cost | Notes |
|---|---|---|
| Claude Pro (AI coding) | $20/month | Used for code generation |
| Domain (.com) | ~$10/year | Purchased on Cloudflare |
| Cloudflare Pages (hosting) | Free | Build + deploy + HTTPS |
| GitHub (code storage) | Free | Public repository |
| Total | ~$21/month | Including domain |
No server costs. Just the domain fee and you can run a blog accessible worldwide.
Summary
Here's what we did in this post:
-
Bought a domain — Purchased
aicraftlog.comon Cloudflare for ~$10/year -
Connected it to the site — Entered the domain in Custom domains → automatic setup
-
HTTPS applied automatically — No manual SSL certificate configuration needed
With this, the technical setup for the blog is complete.
AI generates code → GitHub stores it → Cloudflare builds and deploys → Domain connected.
All that's left is to write content and start monetizing.
Coming Next
Next post: I'll show you how I'm connecting Google AdSense to start earning revenue from this blog.
See you in Build Log #7.
I'm an embedded software developer building AI-powered web services with zero web experience. Follow the journey at aicraftlog.com.
Related Posts
Stay Updated
Get notified when I publish new posts. No spam, unsubscribe anytime.