Build Log #5: How AI-Generated Code Goes Live
From code on my PC to a live website — how Git, GitHub, and Cloudflare Pages work together to publish AI-generated code to the world.
In the previous post, I revealed the 24 prompts that built my entire blog.
But here's the thing:
"The code is just sitting on my PC. How does anyone else actually visit my blog?"
This post answers that question.
First, Let's Look at Where We Are
Claude Code generated the code, and it lives on my PC.
C:\Users\toby\aicraftlog\ ├── src/ ← Blog source code ├── content/ ← Blog posts (markdown files) ├── public/ ← Images, logo ├── package.json ← Project config └── ...
Right now, only I can see the blog. For anyone in the world to access aicraftlog.com, I need to put this code on the internet.
Two tools make this possible.
What is Git?
Git is a tool that tracks every change you make to your code.
Here's an analogy.
When writing a document in Word, you've probably saved copies like "report_v1", "report_v2", "report_FINAL", "report_REALLY_FINAL". Git does this automatically.
One file, all change history recorded, and you can go back to any previous version at any time.
What Git Records
-
When you made changes (date, time)
-
What you changed (which file, which line)
-
Why you changed it (commit message)
For example, if you changed the blog color from blue to green, Git automatically records: "March 1st, line 12 of theme.css, changed blue to green."
Git can be installed from the link below.
What is GitHub?
GitHub is a service that stores your Git-managed code on the internet.
If Git is "a tool that records change history," GitHub is "a place that stores that history in the cloud."
Think of it this way: Git is your diary, and GitHub is the cloud drawer where you keep that diary safe.
Why Use GitHub?
1. Backup — Even if your PC breaks, your code is safe.
2. Sharing — You can show your code to anyone. My blog's entire source code is public on GitHub: https://github.com/johnehk86/aicraftlog
3. Auto-deployment — When you push code to GitHub, Cloudflare automatically updates your website. This is the most important reason.
What is Cloudflare Pages?
Cloudflare Pages is a service that turns code into a website.
The code files on GitHub aren't a website by themselves. For someone to see a page when they type aicraftlog.com, the code needs to be converted into a website and placed on servers accessible worldwide.
Cloudflare Pages does both automatically.
What Cloudflare Pages Does
Step 1: Build — Converts your code into a website.
Step 2: Deploy — Places the converted website on servers worldwide.
And all of this happens automatically with a single git push.
What is a Build?
The code AI (Claude Code) generates uses formats like TypeScript, JSX, and MDX. The problem is browsers (Chrome, Safari, etc.) can't read these files directly.
Browsers can only read three things:
-
HTML — Page content and structure (the skeleton)
-
CSS — Colors, fonts, layout (the design)
-
JS — Clicks, search, dark mode toggle (the behavior)
Building is the process of converting source code into these three formats.
Think of it like translating, editing, and printing a manuscript written in multiple languages (source code) into a book everyone can read (HTML/CSS/JS).
What is Deployment?
After the build, HTML, CSS, and JS files are created. Deployment places these files on Cloudflare servers worldwide, so anyone visiting aicraftlog.com can see the website.
And all of this is possible on the free plan.
The Full Flow: PC → GitHub → Cloudflare
The entire process is just 3 steps.

Step 1: Write Code on My PC
When Claude Code generates code, files appear in my project folder. I can check them in VS Code.
Step 2: Upload Code to GitHub
Type 3 commands in the terminal.
git add . git commit -m "updated blog design" git push
git add . — "Prepare these files for upload."
git commit -m "message" — "Record this change. The note is 'updated blog design'."
git push — "Send it to the GitHub server."
These 3 lines send the code from my PC to GitHub.
Step 3: Cloudflare Automatically Updates the Website
The moment code arrives on GitHub, Cloudflare Pages detects it automatically. It pulls the new code and rebuilds the website.
Nothing for me to do. Just git push, and 1–2 minutes later aicraftlog.com is automatically updated.
Setting Up GitHub for the First Time
If you don't have a GitHub account yet, you only need to set this up once.
1. Sign Up for GitHub
Create a free account at https://github.com.
2. Create a New Repository
After logging in, click the "New Repository" button. Enter your project name (e.g., aicraftlog) and click "Create."
3. Connect Your PC to GitHub
Run these commands in the terminal.
cd aicraftlog git init git remote add origin https://github.com/yourusername/aicraftlog.git git add . git commit -m "first commit" git push -u origin main
This is a one-time setup. After this, git add, git commit, git push — three lines is all you need.
Connecting Cloudflare Pages
Once your code is on GitHub, connect it to Cloudflare Pages.
1. Sign Up for Cloudflare
Create a free account at https://dash.cloudflare.com.
2. Create a Pages Project
In the Cloudflare dashboard, click the "Workers & Pages" menu.
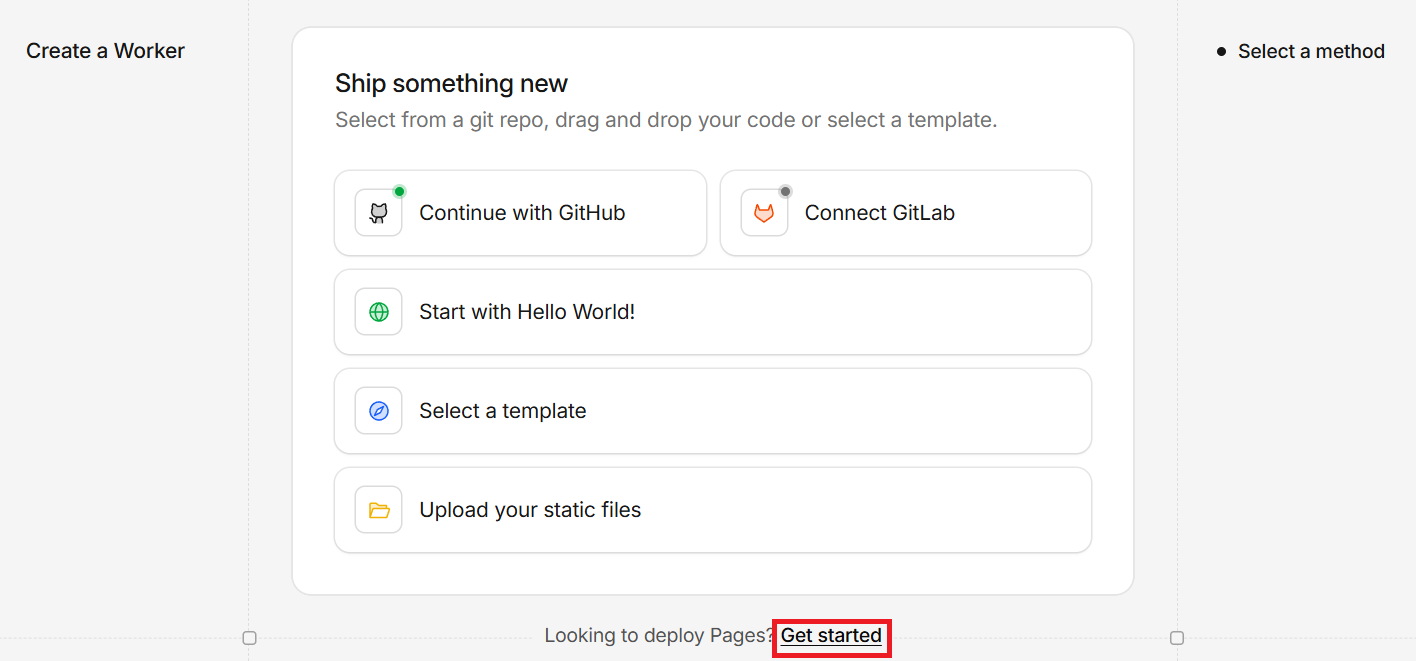
Select "Get Started" to begin.
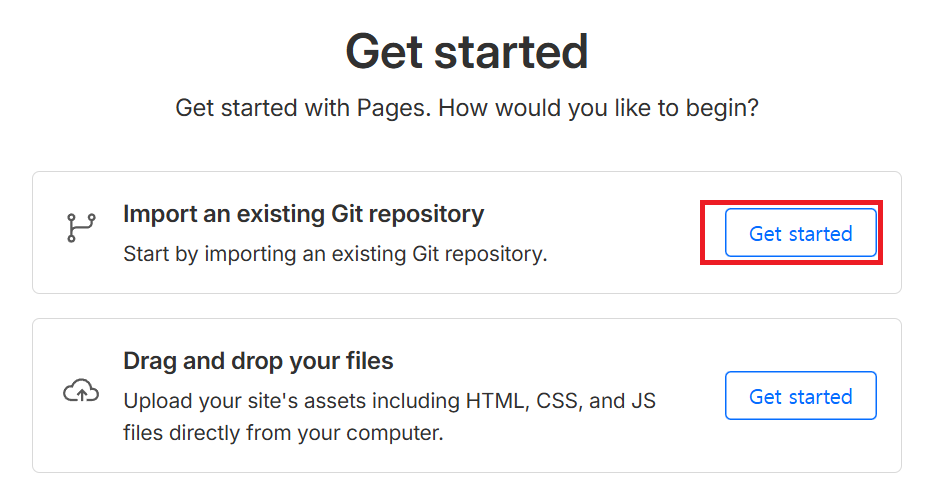
Then select "Import an existing Git repository."
Connect your GitHub account and select your aicraftlog repository.
3. Build Settings
Just enter the build command and output directory.
Build command: npx @cloudflare/next-on-pages Output directory: .vercel/output/static
Click "Save and Deploy" and the first deployment begins.
4. Connect Your Domain
After deployment, Cloudflare gives you a temporary URL (e.g., aicraftlog.pages.dev). Connect your own domain (aicraftlog.com) to it, and you're done.
Summary
| Step | Tool | Role |
|---|---|---|
| Write code | VS Code + Claude Code | AI generates the code |
| Store code | Git + GitHub | Track changes, cloud backup |
| Publish website | Cloudflare Pages | Auto-convert code to website |
The daily workflow looks like this:
Edit code → git add . → git commit -m "message" → git push → Auto-deploy done
Once set up, a single git push publishes your blog to the entire world.
Coming Next
The blog is built. Deployment is done.
Next post: I'll cover how to buy a domain and connect it to your site.
See you in Build Log #6.
I'm an embedded software developer building AI-powered web services with zero web experience. Follow the journey at aicraftlog.com.
Related Posts
Stay Updated
Get notified when I publish new posts. No spam, unsubscribe anytime.